The Complete Bigginer’s Guide to Sous Vide Cooking
You’ve probably heard about sous vide cooking and wondered if it’s worth the hype. This precise temperature-controlled method delivers restaurant-quality results at home, but it’s not just about buying expensive equipment. There’s a specific technique that separates mediocre meals from perfectly tender, evenly cooked dishes every time. Once you understand the fundamentals and avoid common beginner mistakes, you’ll transform how you approach cooking proteins and vegetables forever.
What is Sous Vide?
Sous vide (pronounced “soo veed”) involves sealing food in airtight bags and cooking it in a temperature-controlled water bath. This method retains juices and aromas that traditional cooking loses while giving you complete control over doneness.
The typical workflow is simple: bag your ingredients, set time and temperature, cook, then sear for browning. You’ll achieve restaurant-quality results at home with foolproof consistency that’s perfect for meal prepping, hosting, and entertaining guests.
The History of Sous Vide
Though sous vide might seem like a modern culinary innovation, this precise cooking method actually originated in the 18th century when physicist Benjamin Thompson discovered that food cooked in sealed containers at controlled temperatures produced superior results. The technique evolved through several developments. Today, we’re benefiting from centuries of culinary evolution that’s finally reached home kitchens.
How to Pronounce Sous Vide
Sous vide is pronounced “soo veed” – not “sous vide-ee” or “sous vi-day.” The French term literally means “under vacuum,”. Now that you’ve got the name down, you’re ready to delve into the actual cooking technique that’s revolutionizing home kitchens everywhere.
Essential Equipment
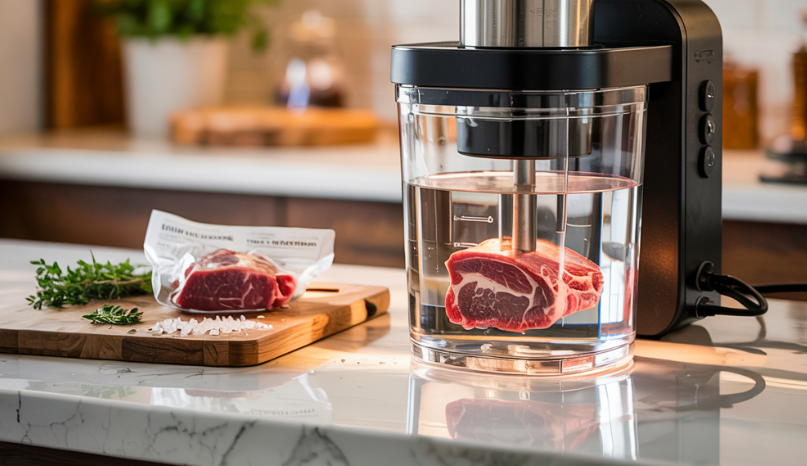
You don’t need much equipment to get started with sous vide cooking, but having the right tools will make your experience smoother and more enjoyable. The essential items include a sous vide machine, a large container with lid, sealing bags or a vacuum sealer, a reliable cast iron pan for searing, and optionally a sous vide stand for organization. Let’s break down each piece of equipment and why it matters for your sous vide success.
Sous Vide Machine
The heart of any sous vide setup is the immersion circulator. This precision tool transforms any pot or container into a professional-grade cooking environment.
Top recommendations include:
- Anova Precision Cooker – offers both manual controls and smartphone connectivity
- Inkbird WIFI Sous Vide Cooker – offers 14 preset recipes
Large Container with Lid
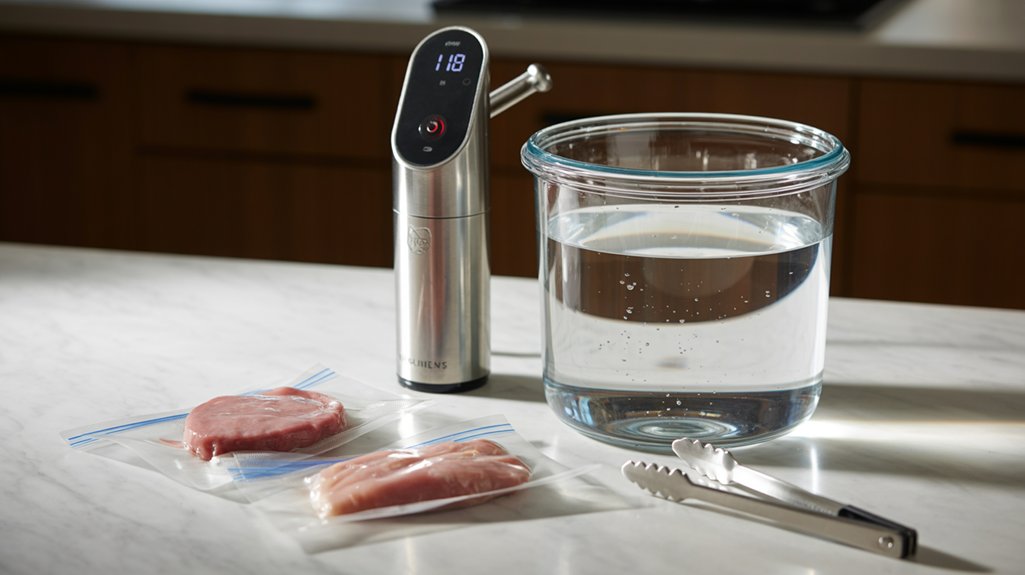
While your sous vide machine provides precision heating, you’ll need a spacious vessel to hold the water and your food. A 12-quart plastic container works perfectly—it’s BPA-free, roomy enough for multiple items, and won’t break like glass.
Don’t overlook getting a lid. It’ll reduce evaporation during long cooks and let you walk away worry-free during those epic 24-72 hour sessions. The Rubbermaid 12-quart container paired with an EVERIE collapsible hinged lid is a great choice.
Sous Vide Bags – Vacuum Sealer
Sealing your food properly makes the difference between restaurant-quality results and disappointing meals. A vacuum sealer removes air completely, creating the perfect cooking environment for your ingredients.
While not mandatory, vacuum sealers offer unmatched convenience and consistency. They’re also valuable for meal prep and batch cooking sessions.
Cast Iron Pan
After you’ve perfected the sous vide cooking process, achieving a restaurant-quality sear becomes your final challenge—and cast iron delivers the superior heat retention and browning power you need.
Cast iron’s thick construction maintains consistent high temperatures, creating the Maillard reaction that transforms pale sous vide surfaces into deeply caramelized crusts.
I own and use both of these brands on a weekly basis.
- Cuisinel Cast Iron Skillet
- Lodge 12 Inch Cast Iron Skillet with Red Silicone Hot Handle
The Sous Vide Process
Now that you’ve got your equipment ready, let’s walk through the actual sous vide process from start to finish. You’ll package your food, set your time and temperature, cook it in the water bath, then finish with a proper sear. These four steps form the foundation of every successful sous vide cook you’ll make.
Vacuum Sealing Method
Before placing your food in the water bath, you’ll need to package it properly using one of two common techniques: vacuum sealing or water displacement.
Vacuum sealing removes air and creates an airtight seal, but it’s not mandatory. The water displacement method offers an affordable alternative using Ziploc or Stasher bags.
For water displacement:
- Submerge the sealed bag slowly into water
- Allow water pressure to force air out naturally
- Keep the bag opening above water level
- Press out remaining air pockets gently
- Seal the bag completely before full submersion
Choose BPA-free freezer bags for longer cooks to guarantee food safety.
The Displacement Method
The water displacement method proves surprisingly effective for home cooks who don’t own a vacuum sealer. You’ll simply place your ingredients in a heavy-duty freezer bag or Stasher bag, then slowly lower it into your water bath. As you submerge the bag, water pressure forces air out through the opening. Once most air escapes, seal the bag completely. This technique works exceptionally well for most foods and costs considerably less than vacuum-sealing equipment. For longer cooks, choose BPA-free and dioxin-free bags to guarantee food safety. You’ll achieve nearly identical results to vacuum sealing.
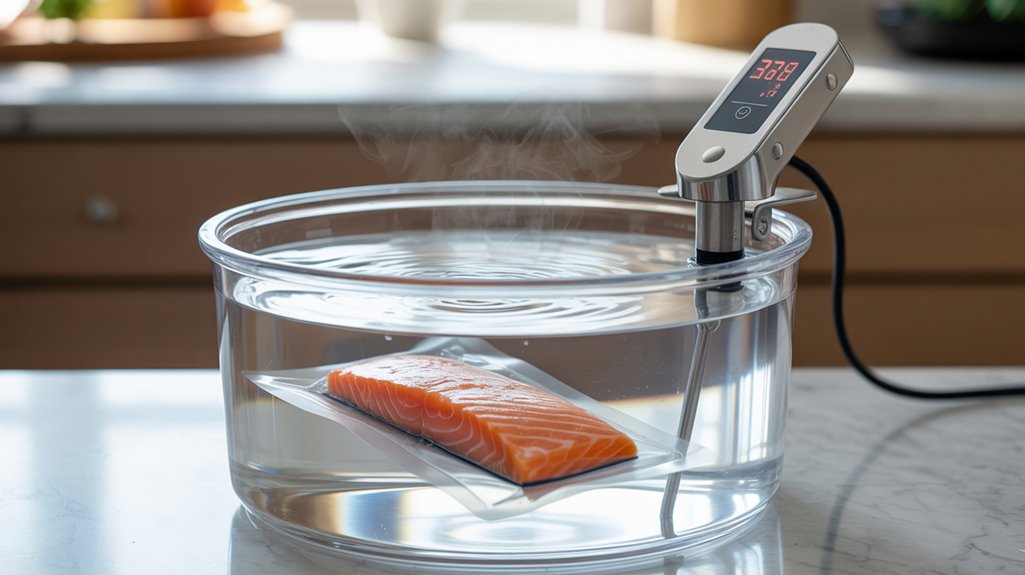
Time and Temperature
Once you’ve sealed your ingredients, you’ll need to master sous vide’s two fundamental variables: time and temperature. Temperature controls doneness—think 133°F for edge-to-edge rosy steak. Time controls tenderness by converting tough collagen into silky gelatin.
Here’s your approach:
- Select temperature based on desired doneness level
- Choose minimum time to make sure food cooks through completely
- Stay within maximum time to avoid mushy texture
- Set your device and let it maintain precise conditions
- Finish with a blazing-hot sear for color and flavor
Remember: minimum time guarantees safety, while maximum time preserves perfect texture.
The Finishing Touch – Searing
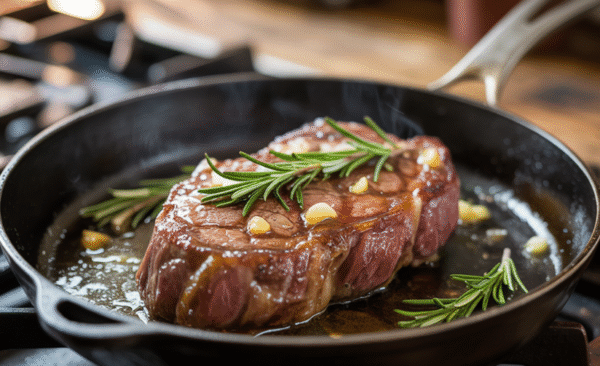
After your protein emerges from its warm water bath, it’ll look disappointingly pale—nothing like the golden-brown masterpiece you’re expecting. That’s where searing becomes absolutely critical.
Pat your protein completely dry with paper towels
Season both sides generously with salt.
Heat your cast iron skillet until it’s smoking hot, then sear for 1-2 minutes per side. This high-heat process creates the Maillard reaction, developing that deep, flavorful crust and restaurant-quality appearance.
Essential cast-iron searing steps:
- Preheat pan on medium-high heat for 3-4 minutes
- Look for wisps of smoke indicating proper temperature
- Add oil with high smoke point like avocado or grapeseed
- Sear 1-2 minutes per side without moving
- Listen for aggressive sizzling throughout the process
Pro Tips
While mastering the basics will get you consistent results, these pro tips will elevate your sous vide cooking from good to exceptional.
- Batch cook multiple items at different temperatures, then store finished portions in your fridge or freezer for quick weeknight meals
- Use an ice bath for thick roasts before searing to achieve a deeper crust without overcooking the interior
- Try the mayo sear technique by spreading a thin layer of mayonnaise on your protein for an incredibly rich, golden-brown crust
- Season generously before sealing and pat dry before searing to prevent burned seasonings
- Avoid high-salt marinades for long-term freezing as they’ll cure your meat
Conclusions
Now that you’ve learned the fundamentals of sous vide cooking, you’re equipped with everything needed to create restaurant-quality meals in your own kitchen. You understand how temperature controls doneness while time affects tenderness. You’ve mastered the critical searing step that transforms pale sous vide results into beautifully browned, flavorful dishes. With your essential equipment and proven techniques, you can achieve consistent, repeatable results every time. Start with simple proteins like steak or chicken, then experiment with more complex recipes. Remember, sous vide’s forgiving nature means you’ll succeed even as a beginner. Your culinary journey starts now.